


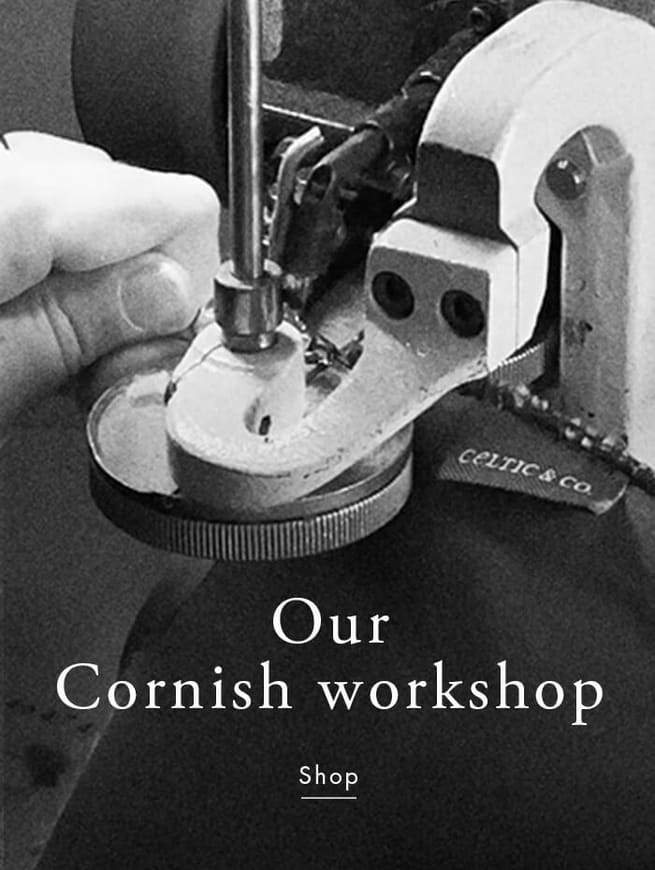


FORM CUTTING
━

After sorting and grading the sheepskin to find the best suited to each product, the cutting team take their selection to the hydraulic click press. Here they lay the pattern cutting knives on the sheepskin and click out the shapes needed to make the slipper. They cut a card insole and 100% sheepskin insole at this stage too.
FRONT SEAM
━

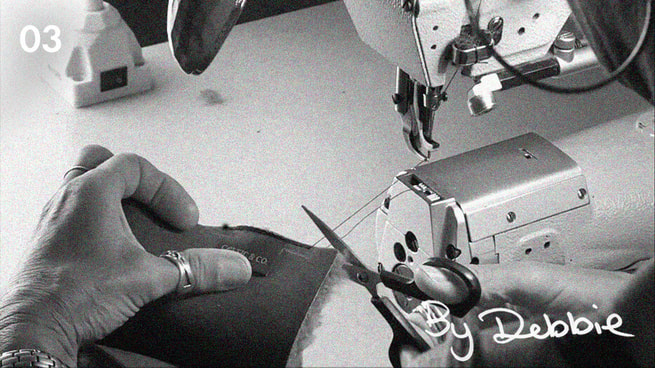
Using our specially modified and unique to us, ‘cupseam’ machines, the first sewing stage is the toe seam. The machinist starts at the bottom of the toe seam, expertly easing the sheepskin and fluff into the machine. They turn at the guide point and do the second row of the stitching back down to the toe, before chaining off their stitch. This chained stitch ensures that the stitching doesn’t unravel if caught.
SUPPORT LABEL
━

A suede triangle is then sewn over the top of the seam to help protect and strengthen the seam and sheepskin when putting the slippers on and off. Our label is then sewn into the back of the panel.
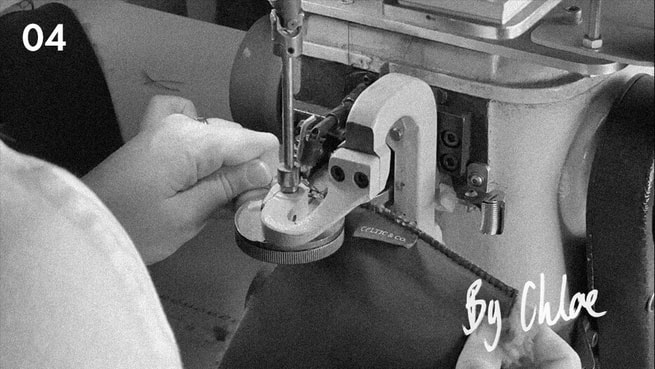
BACK SEAM
━

The slipper then is passed back to the ‘cupseamer’, who sews the back-seam, starting at the bottom, again doing two rows, and leaving a chained stitch at the bottom.
INSOLE & BIND
━

Now the upper is formed, the slipper is now ready to have the insole attached. The machinist tack the toe of the slipper to the front mark of the insole, then starting at the backseam will sew around the base, expertly easing in the sheepskin to get a lovely rounded toe shape. They then take their slipper to the binding machine, where they feed the slipper through the folder to sew the binding around the base of the sole.
SOLE CUTTING
━

Once the upper is created, the sole is then cut out of the sheet using a hydraulic click press.
GLUEING & FINISH
━

The team use a contact adhesive glue, pasting glue to the sole, and then the upper, before using their hands to manipulate the slipper to the perfect fit to the outer sole. They then use a hair brush and felt wheel on a rotating machine to remove any excess glue or soling material.
QUALITY CONTROL & PACKING
━

Now the slipper is complete it is ready to for 100% QC, the team check for any imperfections. Due to our ‘no defect forward policy’ any faults at this stage would go back to be corrected, until our 100% high quality control standard is achieved. The team then put then the swing tag and size sticker on the slipper before packing them ready for dispatch.
